How to Host a Static Website on Amazon S3 Bucket?
Introduction
AWS (Amazon Web Services) Provides a Service named S3 (Simple Storage Service) which is a storage solution based on object-level. In this blog, we are going to explore how to host a static website on Amazon S3 bucket integration with CloudFront service, AWS web console and proper SSL certificate.
AWS Bucket Creation
Login to AWS Console and from the top searching bar, Search for S3.
Create a new bucket, if you don’t have any. As for my Suggestion during the Creation of Bucket try to give bucket name as a URL like ‘pritam.gq’
While creating a new bucket uncheck “Block Public Access settings for this bucket”. This will make the bucket public so that we can access our static site and leave all configurations as default.
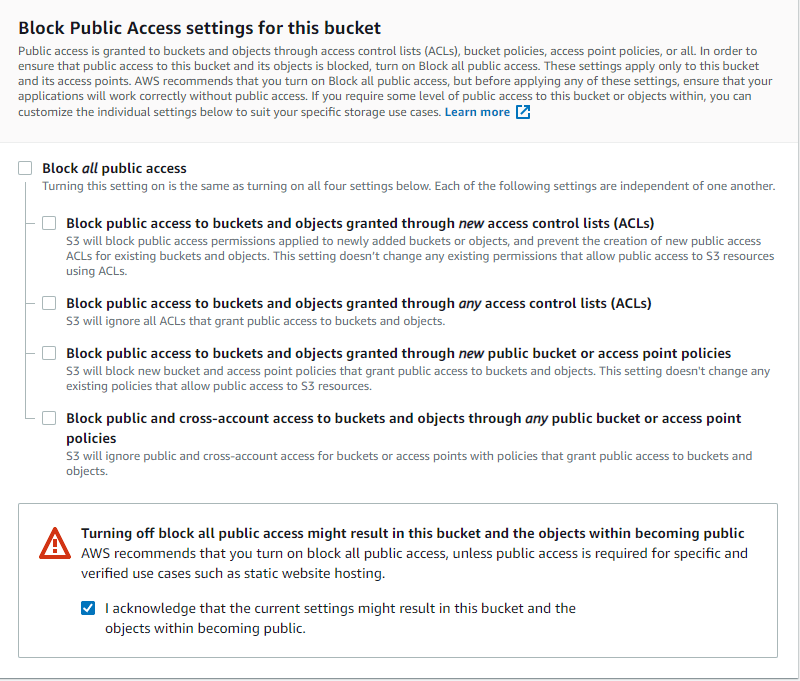
You Can See the newly Created Bucket on the following Screenshot

1. Go to your bucket and press on permission,
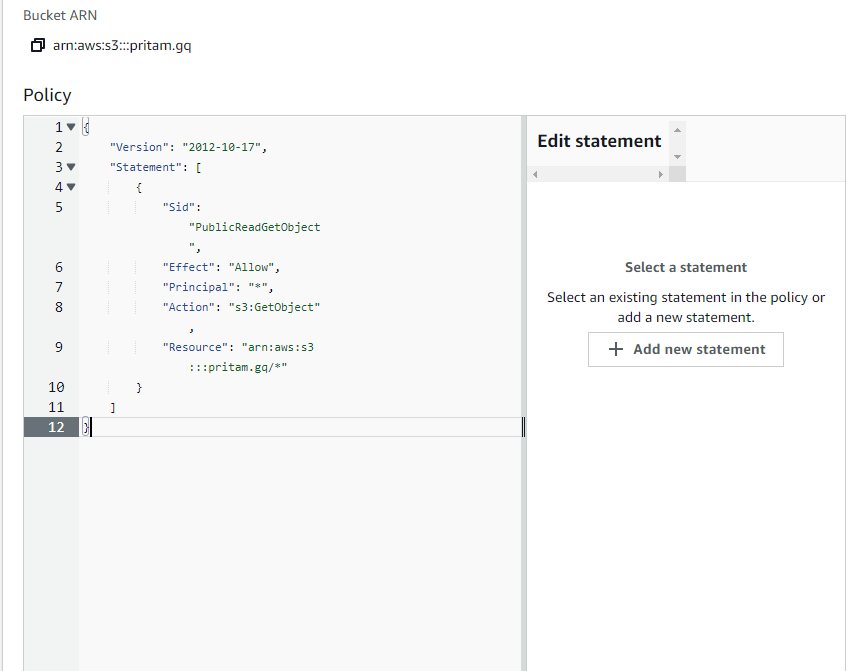
2. Add this given bucket policy:
{
    "Version": "2012-10-17",
    "Statement": [
        {
            "Sid": "PublicReadGetObject",
            "Effect": "Allow",
            "Principal": "*",
            "Action": "s3:GetObject",
            "Resource": "arn:aws:s3:::pritam.gq/*”
        }
    ]
}
Note: Change bucket name from above-given policy. Instead of pritam.gq, it will be your bucket name.
Go to Properties and find the option Static website hosting.
Enable static website hosting and add Hosting Type as “host a static website”. Insert filename in index document. In my case file name is “index.html”
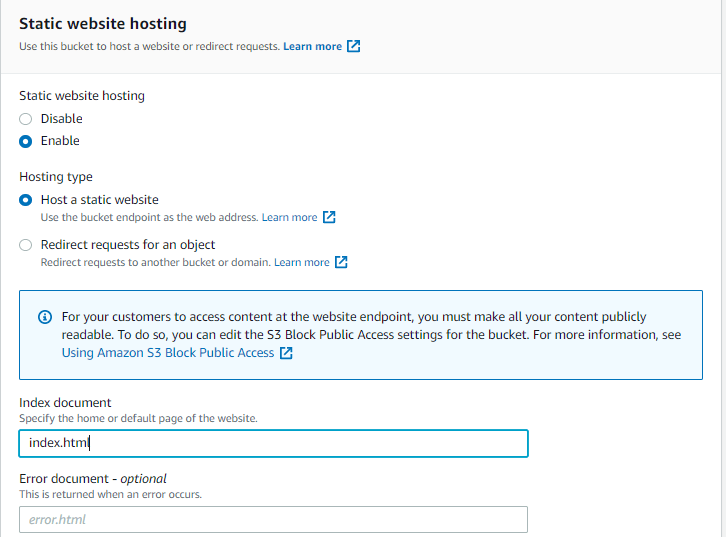
Save that change.
After saving it will give you one URL, from that URL we can verify our website. It will look as below.

Upload the Contents to see the website live.
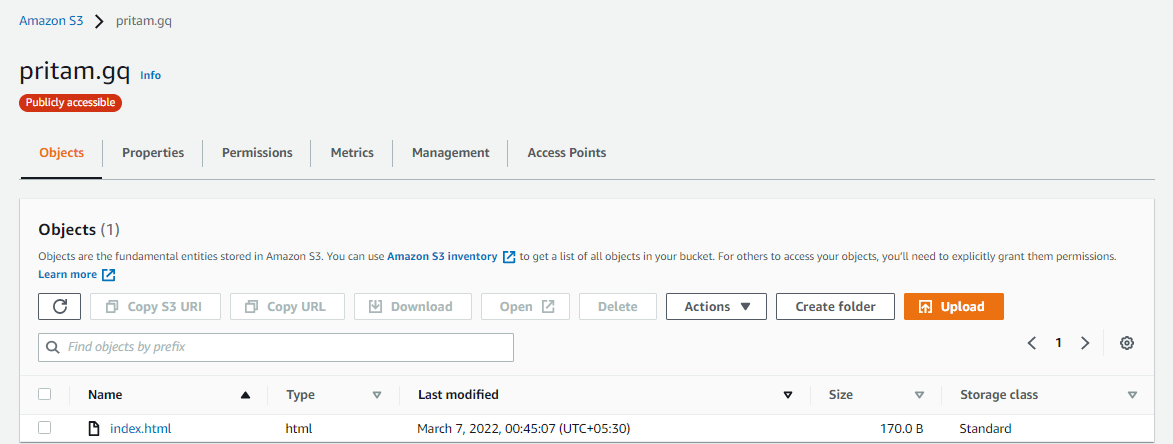
We are done with the AWS S3 Service.
AWS Cloudfront Configuration
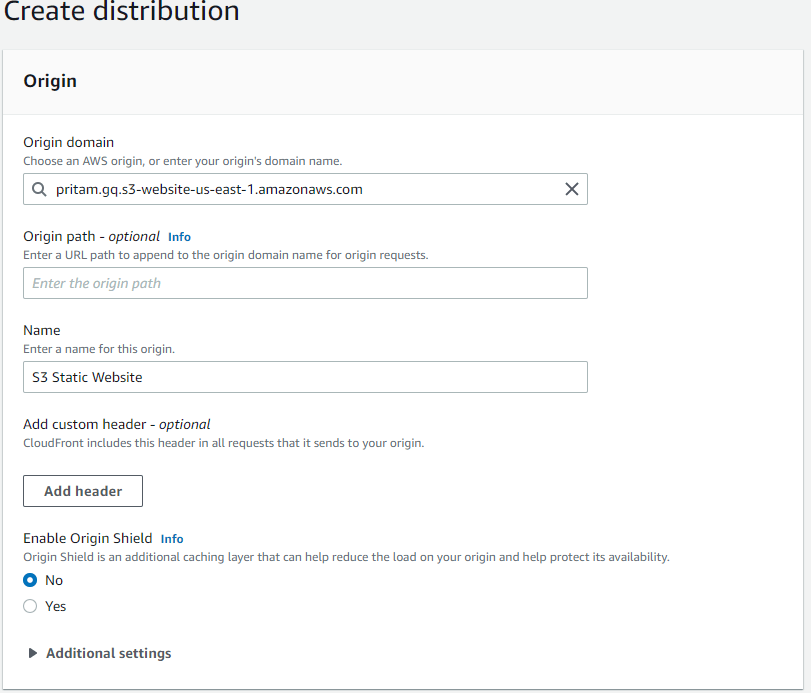
Create a new CloudFront. Enter your ‘Bucket website endpoint’ URL in the Origin domain.
Note: Don’t select the bucket which is shown in the dropdown list. Because the endpoints are S3 Bucket REST API and that will not work with this configuration.
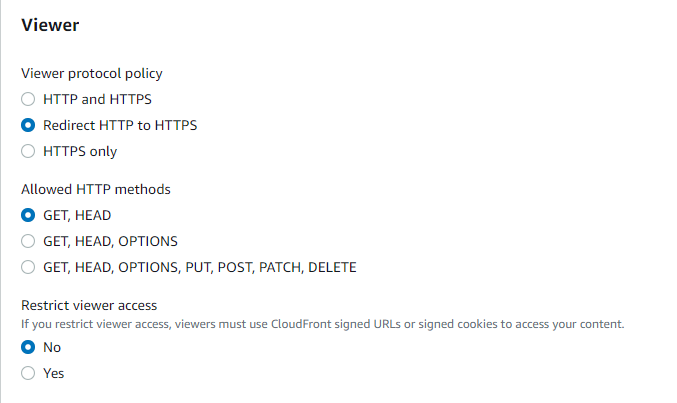
Select option Redirect HTTP to HTTPS.
Choose an SSL Certificate if you have, and if not then just apply for a free Certificate from ACM (Amazon Certification Manager)
After creating a new CloudFront, you will get a URL, from which you can access a static website that is there in the S3 bucket.

Add this Distribution domain name to our DNS Provider with CNAME and Subdomain, in my Case It is AWS route53.
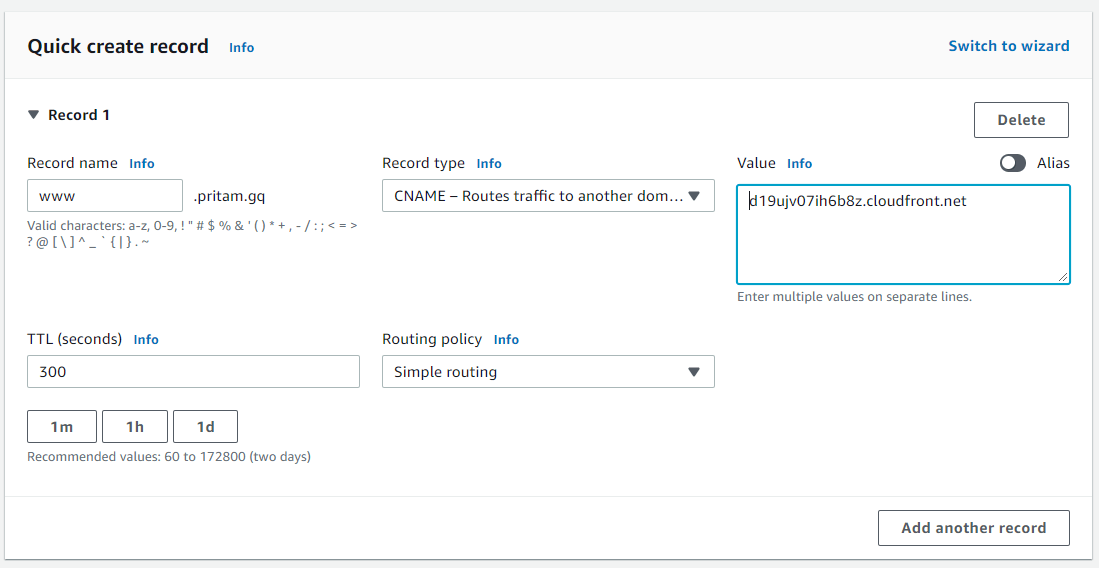
Now we can see our website from the URL ‘www.pritam,gq’

Conclusion
In this blog, we see the configuration and host a static website on Amazon S3 Bucket. We also used our own domain to launch that static website. We also use Cloudfront for HTTPS requests.
From now on you can create many static sites, after your site is ready and tested in your local machine. You can upload your static websites in the s3 bucket. So that anyone can access your website globally. And you don’t need to rely on Servers from now on for static Websites because s3 is based on serverless architecture and AWS manages it for us.


